 Read all directions before starting!
I used to be intimidated by the whole canning thing. No need though, as canning is not very difficult at all. I picked about 8 lbs of carrots (and beets, too!) and got busy canning them. Here is a very easy, step by step guide in canning carrots.
First pick your carrots.

Second, put them in a large bowl filled with water to soak while you scrub each one with a scrub brush. Scrub them really good to get off all the dirt in the crevices! Isn't the color stunning?

Slice the carrots into nice pieces, neither too thin nor too thick. At this point, you can put them into baggies and put them into the refrigerator overnight, as I did. If you're not too tired, continue... At this point you want to have your canning jars hot. I put mine in the dishwasher and run them through a full cycle so they are clean and hot when I need them. Also, get your water going in your pressure canner.

Put water into a large pot and put a colander inside the pot with the carrots in it. When the water comes to a boil, reduce heat and simmer carrots for five minutes. They will still be a bit firm; you don't want to cook them all the way through. Remove from heat.

While the carrots are cooking, get your canning jars out of the dishwasher and put one teaspoon salt in each quart jar and one half teaspoon salt in each pint jar.

Next, using a canning funnel, fill jars with carrots filling only to the bottom of the neck of the jar. Shake down a bit.

Fill each jar with nearly boiling carrot water using a ladle. Fill just to where the bottom of the canning funnel is inside the jar, which is 1/2" headspace. Wipe around the outside of the jar with a clean, wet, cloth. Put on
lids, jar rubbers and metal rings.

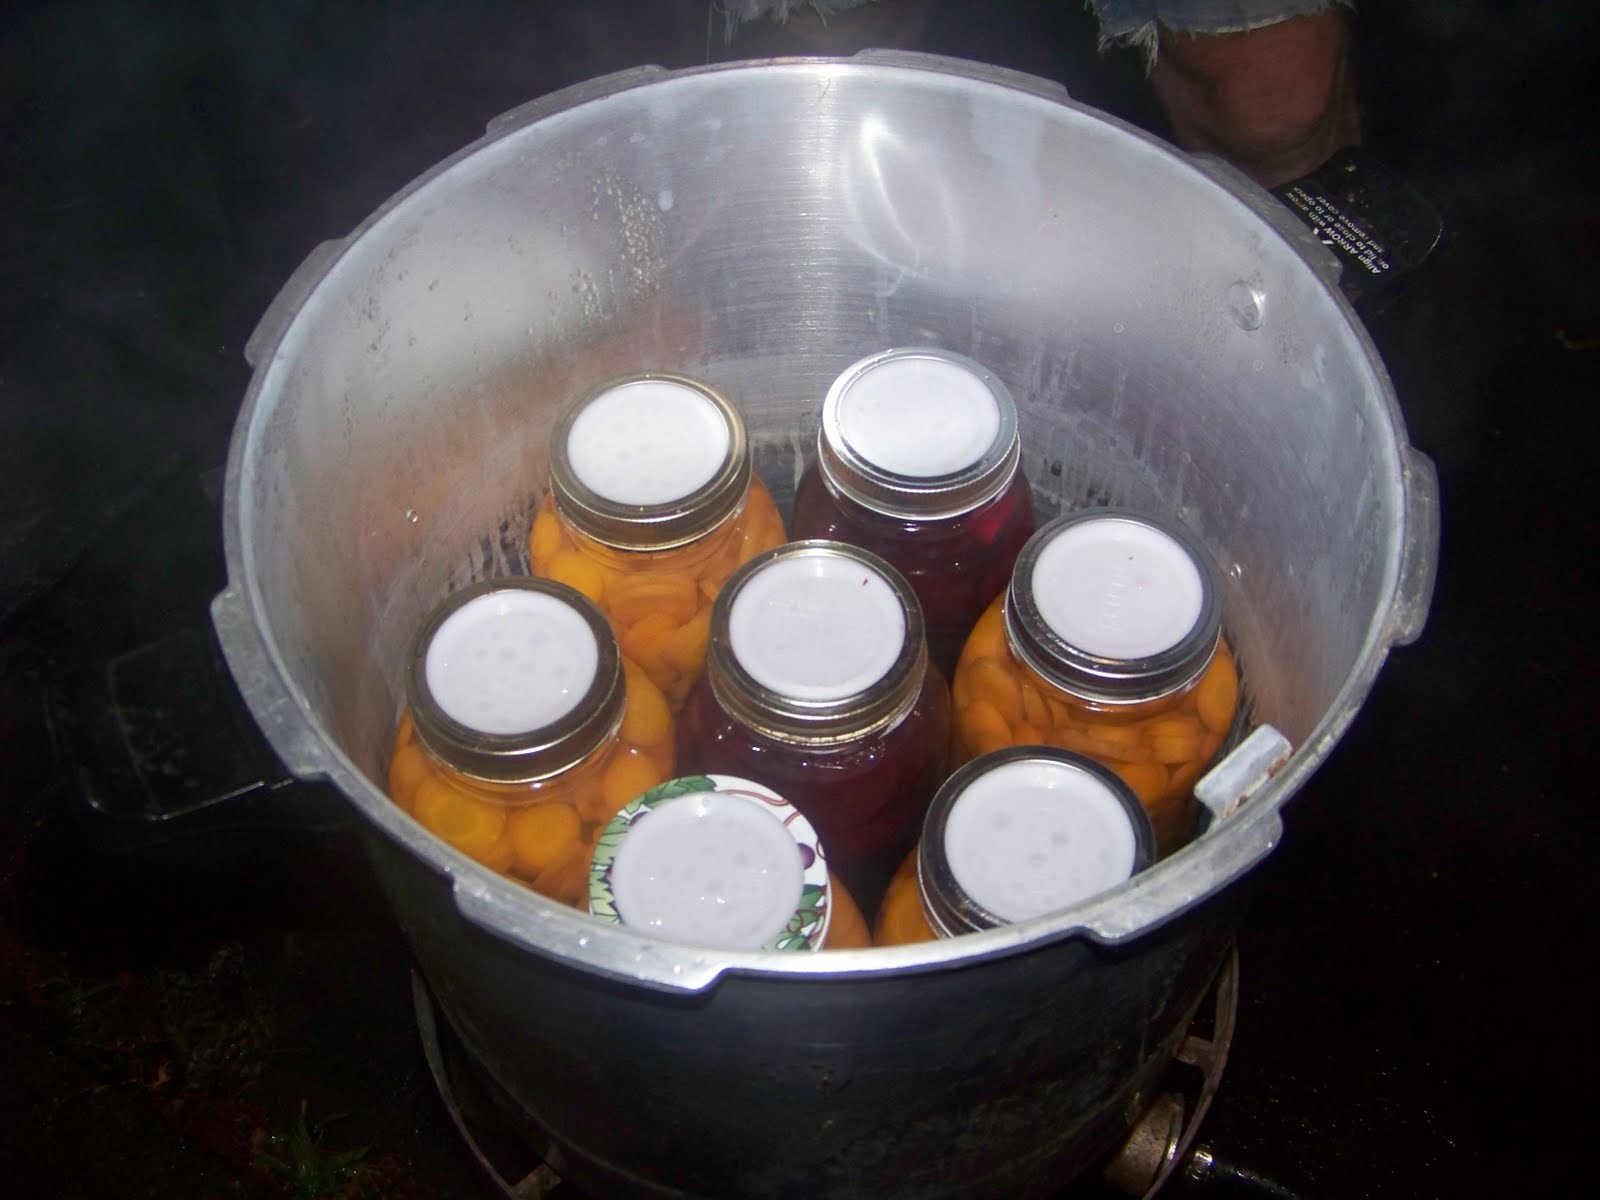
Place in pressure canner and process for 30-35 minutes at 10 lbs.

Remove and admire your beautiful jars of carrots. You'll really enjoy them this winter!

 You Go Girl On the Edge Pillowcase is done! Kyle's girlfriend, Julia, has a birthday coming up in a few days and I thought she would like two pillowcases and a little embroidered pillow to match. This is the second time I've made these babies and I love them every time. You can get the free directions and tutorial by clicking the link above.


