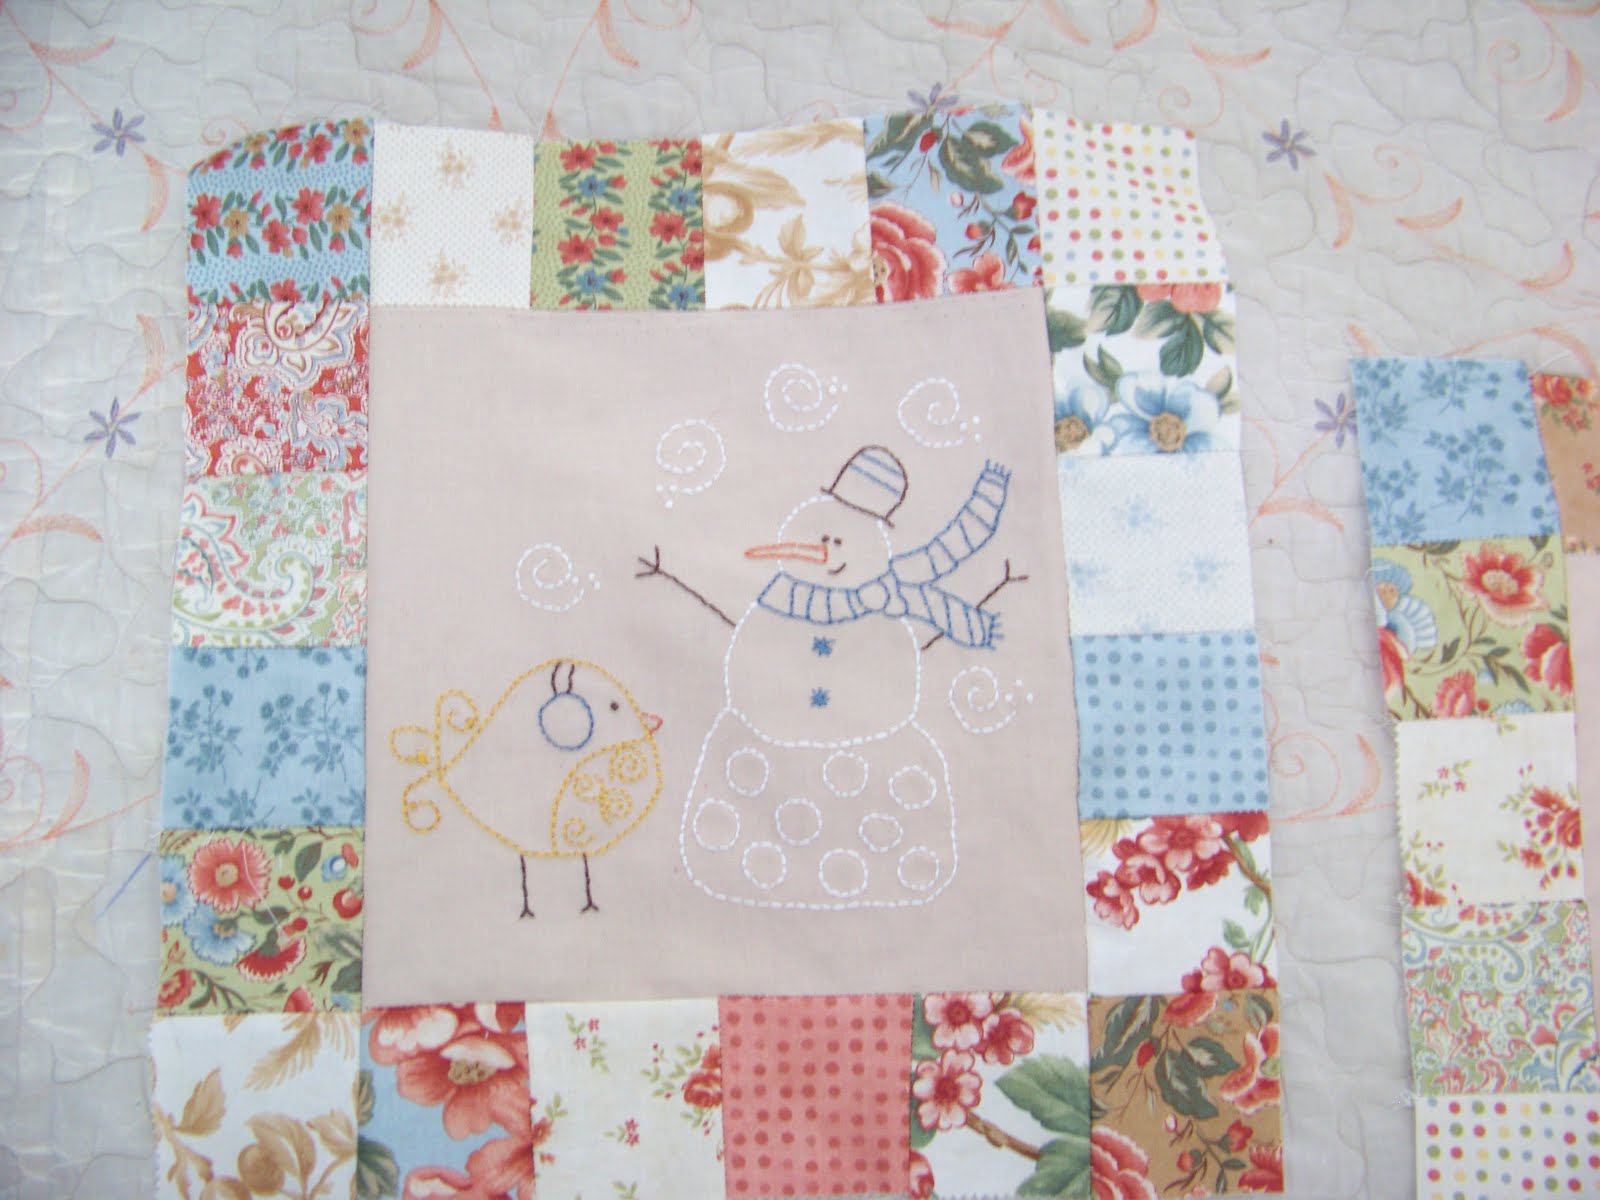
UFO's upset me. Do they bother you? I have several; some are knitting, some cross stitch, others embroidery and some are quilted. I like to keep life interesting so I change it up a bit. This year, the cross-stitch group I belong to thought it would be a good idea to get some of us to move on some projects that have been put aside for one reason or another. They all needed to be cross-stitch (it is a cross-stitch group afterall) except for one and there could only be five. Easy enough! So I chose this embroidery/quilting project that is so near done I can taste it. That's my one non-cross-stitch project for this game. I think I can get this one checked off my list at some point.
Now this project is a different story. It is a learning hardanger project. I'm not much of a hardanger girl but I do love the look of hardanger, just never ventured into those waters. As you can see from the picture below I'm nearly done except to fill in the spaces. I have one HUGE mistake that is holding me up. I cut threads that shouldn't have been cut. With all the work that's
been put into this piece, I hope one of the more experienced stitchers in my group can save it and me! I could just cry... this one I've chosen to set aside for now until I can get help for it.
It is a pretty one though, isn't it?
This project will be a Christmas exhange ornament for my group. I have to keep it secret though, because I don't want anyone peekin' til it's exchange time.
This one all packaged up and ready to stitch is a free hardanger ornament. I think I can handle it; it's not too big or complicated. Glad I got my feet wet on the other disaster listed above... My friend, Rose, stitched this one already and it's a pretty one, and free, too! It's called Holly Quilt Block by The Victoria Sampler.
I have a fair start on this one. It's called Fall Snapperland by Bent Creek. Embarrassingly enough I started it last year and didn't get too far. I hoped to finish it up this fall but I'm not so sure about that. I feel pressure to get some Christmas projects out of the way before I do stitching for myself. I still have five more washcloths to knit for someone and a Christmas stocking to make for my grandson.
I do have some lovely Christmas stockings that I just completed yesterday, though. I'll be back with a post and some pictures on those next time!
Showing posts with label Embroidery. Show all posts
Tuesday, October 29, 2013
Thursday, December 22, 2011
I'm Sewing As Fast As I Can
This little doll quilt was made from scraps and fat quarters I had in my stash. I thought this little scottie dog would be cute for Kierra's new doll she'll get for Christmas.
Pierogi
1 beaten egg
2-1/4 cups sifted flour
1 tsp salt
2/3 cup milk - hot
2 TBS butter
Melt butter and milk together - cool 'til warm. Add rest of ingredients and mix with hands to make a nice dough.
Filling
Potato and Cheese
Boil four peeled potatoes, mash. Add butter and 1-1/2 lbs of Farmer's Cheese. Mix.
Saurkraut Filling
Brown salt pork til crispy. Toss salt pork and to the grease brown chopped onion. Rinse saurkraut (I usually use one large can and one small bag of saurkraut). Place in bowl and mix kraut with grease. I know, not the healthiest thing here but hey, it's only once a year!
How to Make pierogi...
Roll out dough nice and thin; a little thinner than a ravioli. Take a glass and cut circles. Dip your finger in some water and trace around the edge of the dough to help it stick. Fill with a small spoonful of filling and fold dough over itself and stick together. Use the backside of a fork to press down the edge. Once all the pierogi are made, place in boiling water for 10 minutes. This step needs to be done in batches and takes awhile. We do it on a propane cooker in the garage. One year we broke a glass 9x13 by cooking them on the stove. Another year we burned out our microwave from the steam from the top of the stove going up to where the microwave is (over the stove). So... we learned our lesson and do it out in the garage!
Once all the pierogi are made (and yes, you'll have some "blow-outs" as we call them, where the edges come apart and the filling leaks) it's time to freeze them or put in the 'fridge.
When it's time to actually eat them, we like to brown them in a bit of butter.
Tuesday, December 6, 2011
Sew Happy Sew Along Christmas Banner
Wednesday, November 9, 2011
Knitted Bottom Drawstring Pouch
I had this piece of embroidery from quite awhile ago. I did it on some monthly embroidery group but never put it together with the rest of the blocks. So, it didn't go to waste! Now that I tried my first one, I'd like to make a few more. Next time I'm going to use some of the vintage bureau scarves I've collected over the years. I think they are lovely and this project will showcase them well.
Saturday, June 4, 2011
Just Checking In
The baby crow, above, has a hurt wing. Yesterday, Kaleigh and I heard the crows making quite a racket. She went out to see what the fuss was about and the crows were swooping down trying to attack our kitty, Misty. She is the sweetest cat out of the three that we have but who could blame the crows? Misty was "playing" with the baby crow! Kaleigh was able to scare off the crows back high into the trees and my husband went out and picked up the baby bird and put it on the sky fort. Hopefully, the baby will be able to fly back up into its' nest. Naughty kitty!
I haven't done any knitting lately. I think I have arthritis in one of my fingers from repetitive motion. It started about a year ago and I ignored it and plugged along. At this point, it's swollen and hurts so I'm giving it some TLC and rest. I'm drinking tart cherry juice and have some raisins soaking in gin to eventually, hopefully, relieve the swelling and pain.
So instead of knitting I'm embroidering, cross-stitching and reading. I also have some sewing to do so those things should keep my hands busy, for now.
Kaleigh is off taking her SAT's this morning. I hope she does good. Cassidy just told me she asked for the intercession of St. Dymphna and St. Thomas Aquinas to help Kaleigh along! I love to see the kids live their faith!
Labels:
A Day in the Life,
Embroidery,
From the Sewing Room,
Quilting
Thursday, April 14, 2011
Springtime at the Cottage
I hope your spring is making you smile and bringing you peaceful joy in watching God's hand at work this special time of year.
Monday, February 21, 2011
It's Been a Long Time...
My beautiful friend brought me a ray of sunshine the other night; a pretty yellow Kalanchoe. It's gracing my bedroom windowsill and brings a ray of sunshine into my room even during a cloudy afternoon!
I hope you are staying warm and drinking in all this beautiful season has to offer. Keeping warm by the woodstove at night, taking brisk walks during the day and soaking in the sunshine and blue skies; it's all good!
Labels:
A Day in the Life,
Embroidery,
Knitting Basket,
Sewing Basket
Monday, December 13, 2010
Some Christmas Finishes
We got Kaleigh a Kindle and I thought I would sass it up a bit with a pretty cover. The fabric is an Amy Butler print with matching insides below...
Hope you are enjoying some snow...we haven't had any significant snowfall yet here in Massachusetts. I'm sure we will though...soon enough!
Thursday, November 26, 2009
Happy Thanksgiving & Jane Austen Book Bag
Happy Thanksgiving! Now that the day is over all I can say is "I'm full!" We had a nice family day, though fairly quiet as our Thanksgiving Day tends to be. Me, my hubbie and girls cooked and baked and then we all ate! Hope your day was filled with those you love and lots of good food!
I finished the Jane Austen Book Bag I made for Kaleigh for Christmas. It's cross-stitched on linen using the pattern from The Sampler Girl. I changed up the colors and added a zipper on the bag.
The bag is lined, too. I really like the Sampler Girl's patterns and will be buying more of them. She has a sale going on until Sunday. I'm trying very hard to be good but I just may have to give in and buy a thing or two! ;)
Monday, August 3, 2009
Animals in Aprons Wall-Hanging
Now that Cassidy just turned nine, I thought it was high time I completed her baby sampler. I know it's a little late but hey, better late than never, right? This was a joy to stitch. I let Cassidy choose which animals she wanted on her wall-hanging, and what material she wanted for aprons for them. If you'd like to see the real Animals in Aprons, you can google in Vicki Haninger, Animals in Aprons. For some reason, I don't have the web address on the bottom of my pages.
This is how we spent our day today at the resevoir. It's supposed to be a beautiful week so we may go back later in the week. The kids have so much fun there and it's very relaxing as there aren't any waves like at the beach. See...
even the hubs likes it there.
Wednesday, May 27, 2009
New Banner
So many people would ask me if the old banner was my house. I would always answer, "No, but I wish it was!". So I decided it was time for a change. I decided to do a bit of embroidery on a piece of linen, then 'frame' it with some 1930's prints. It's now hanging in my kitchen. It goes perfectly with the rest of the decor and it really screams 'me'.
Tuesday, April 7, 2009
French Knot Tutorial
Making a french knot seems to be a little confusing, but really, it's a very easy stitch once you know how to make one. I wish you could sit right here next to me, in my very cool penguin PJ's, but since you can't, I'll try my best with the help of my second rate camera, to show you how to make one, step by step. So here we go:
Thread your needle with two stands of embroidery floss and knot the end. You can use a waste knot instead, but I usually don't.

Oh, and I don't use a hoop when I embroider. I like to hold the material in my hands. So our first step is to hold the material taut. Don't be afraid to grab and crinkle it... we can always iron it later...

Next, pull the thread up through your material from the back side (with your right hand), holding your material with your (left) hand very taut.

Now, hold the thread with your (left) thumb and pointer finger, very tightly.

Now, place the needle side-ways, UNDER your thread, all the while, holding the thread taut.

Wrap your thread twice (or however many times you need to) around your needle, all the while, holding everything tightly.

Now poke your needle down into your material very close to where you came up, all the while still holding the thread and material tightly. As you pull the thread down from the underside (with your right hand), with your (left hand), guide your floss and hold floss tightly to make a nice, neat knot.

Ta-daaa... you're done. Now try again. You probably didn't get it the first time through, but if you keep trying a few times, I think you'll get it.
Thread your needle with two stands of embroidery floss and knot the end. You can use a waste knot instead, but I usually don't.
Oh, and I don't use a hoop when I embroider. I like to hold the material in my hands. So our first step is to hold the material taut. Don't be afraid to grab and crinkle it... we can always iron it later...
Next, pull the thread up through your material from the back side (with your right hand), holding your material with your (left) hand very taut.
Now, hold the thread with your (left) thumb and pointer finger, very tightly.
Now, place the needle side-ways, UNDER your thread, all the while, holding the thread taut.
Wrap your thread twice (or however many times you need to) around your needle, all the while, holding everything tightly.
Now poke your needle down into your material very close to where you came up, all the while still holding the thread and material tightly. As you pull the thread down from the underside (with your right hand), with your (left hand), guide your floss and hold floss tightly to make a nice, neat knot.
Ta-daaa... you're done. Now try again. You probably didn't get it the first time through, but if you keep trying a few times, I think you'll get it.
Subscribe to:
Posts (Atom)